Physical Address
304 North Cardinal St.
Dorchester Center, MA 02124
Physical Address
304 North Cardinal St.
Dorchester Center, MA 02124

Are you looking to install WordPress SSL to your website, with the goal of moving it from HTTP to HTTPS? That is one smart move you will really be grateful to yourself for.
You know why? Embedding WordPress SSL (HTTPS) will go a long way to give your website some trustworthiness. More details on that shortly.
But what exactly are HTTPS and SSL all about, you may be wondering? Not to worry, we will get to that as well.
Whenever I encounter loading issues, my first thought is always ‘is website down‘ or is it just an issue on my end?
In this post, we will be showing you the steps to setup SSL to WordPress. Even if it is you are just a newbie to WordPress, following this guide won’t be a problem.
You can export HTML from Figma using a complimentary plugin available in the Figma community.
That said, here are the points we will be covering in this guide:
To begin with, HTTPS and SSL are the acronyms for HyperText Transfer Protocol Secure and Secured Sockets Layer, respectively.
But what do they even mean, and why should you care?
Let’s start with HTTP first. As the name suggests, this is a technology – or protocol, in this context – that makes it possible for data to be transferred on the world wide web.
For example, when you fill an opt-in form by providing your contact information, that data will need to be transferred from your browser to the relevant web server. This is where HTTP comes into play.
The problem with this arrangement is that the data you send over the internet can be breached. A hacker can gain access to your network and steal this data.
Now, imagine if the stolen data was your credit card details and not your contact information. That could have disastrous consequences.
To make the web safer and guard against data breaches, HTTPS had to be invented and is now used in place of HTTP.
So, basically, HTTPS is the secured form of HTTP.
HTTPS works by using encryption technologies like SSL, or TLS (Transport Layer Security). Thus, by implementing WordPress SSL (HTTPS) to your website, your users’ information becomes more secured and less likely to be breached.
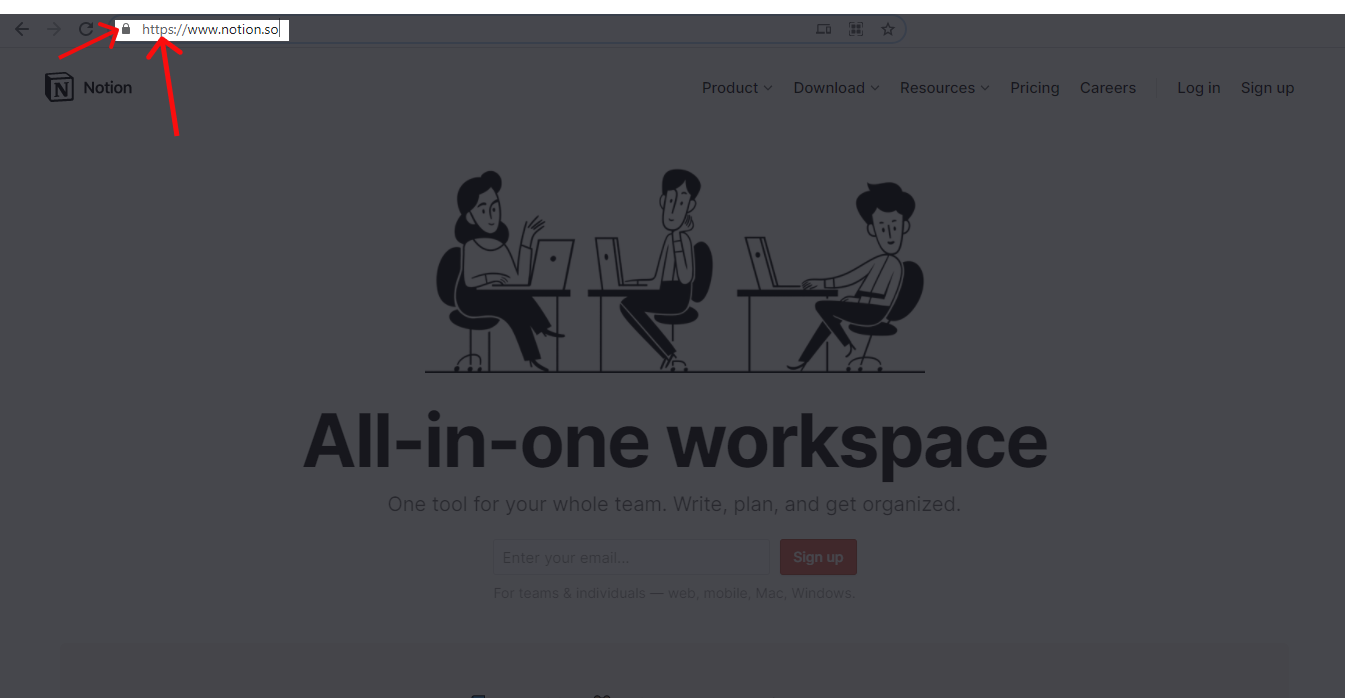
How do you know if a website runs on HTTPS?
Simple. Just look it up in the address bar of your browser. If it does, you will see two things:
But why take the stress of moving your website from HTTP to HTTPS? Yes, it makes your users’ data more secure, but is that enough reason to warrant the migration?
To answer that questions, here are reasons why you will want to make the move:
For this reason, if you don’t want your website to come under Google’s hammer, securing your website key.
With that out of the way, let’s now show you steps to migrate your website from HTTP to HTTPS by setting up WordPress SSL.
Depending on your hosting provider, you might never really have to worry about manually installing an SSL certificate to your WordPress website. This is handled out of the box for you. And for free, in most cases.
But, you might not be so lucky. Maybe your hosting provider isn’t one of those that offer automatic SSL installation. Perhaps they do, but you simply can’t afford it. Or, your website is already on HTTP, and you want to move it to HTTPS.
Whatever be the case, here are the steps to migrating a website from HTTP to HTTPS.
The very first thing you will want to do is to get an SSL certificate. Now, there are a couple of ways to go about that.
One is to purchase it from third-party vendors like Digicert, SecureTrust, or RapidSSL.
But those vendors sell premium certificates which you might not be able to afford.
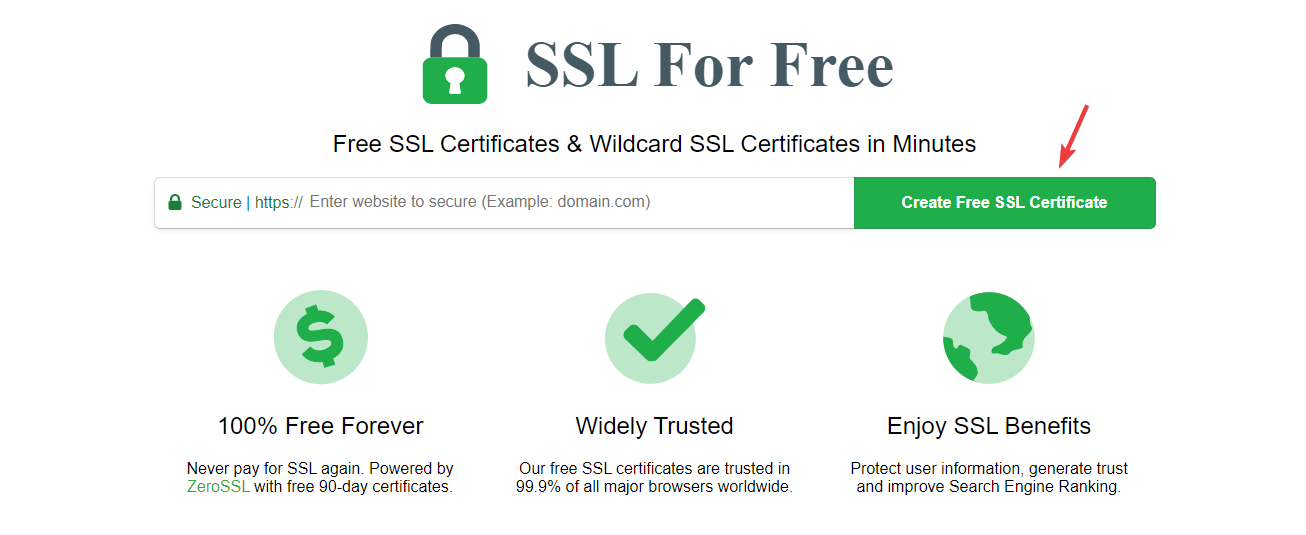
If that’s the case, your next best option is to get it for free from places like Let’s Encrypt or SSL for Free.
Need help getting a free SSL? We figured out that you would.
Let’s now show you how to get one from SSL for free. So, head over to their website by following the link above. Once there, click the green button like so:
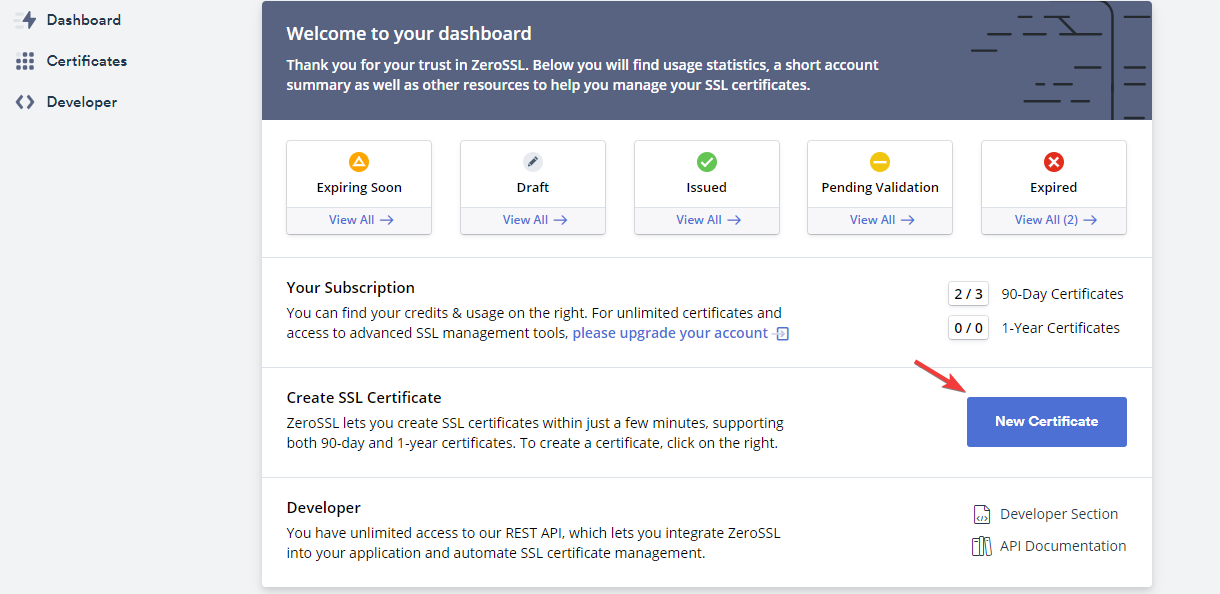
Upon click, you will be redirected to a signup page. Type in your email address and set a password to register.
After registering, what you will see next is your account dashboard. There, click the New Certificate button.
Then enter your domain name accurately as shown below:
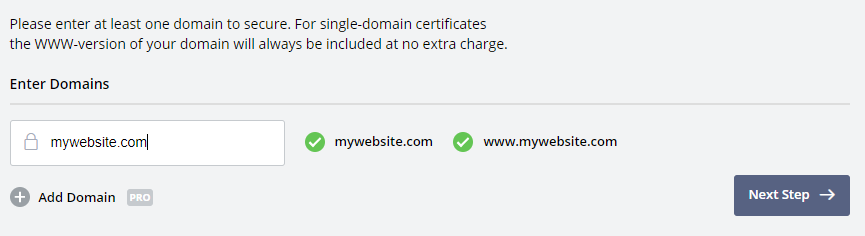
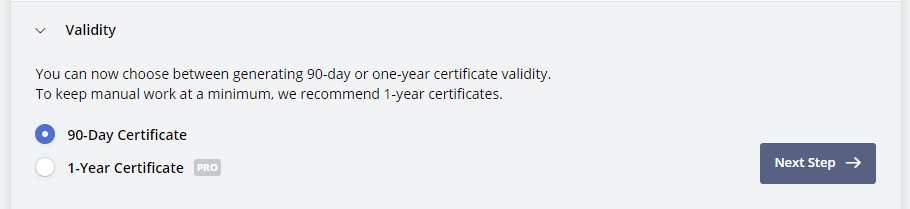
Hit the next step button afterward. Then select the 90-day validity certificate – it’s the only free available option.
Click the next step button again. In the CSR and Contact section, click the next button as well, with the Auto-Generate CSR checked.
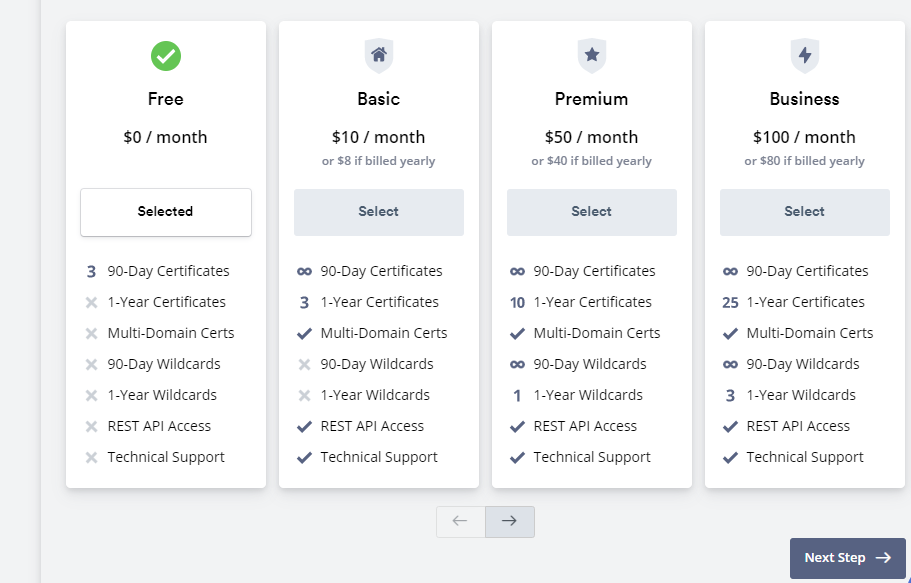
In the Finalize Your Order section, select the free plan and click next.
After that, you will be asked to verify the ownership of the domain you are looking to install the certificate on.
There are three ways to go about that: Email Verification, DNS, or HTTP file upload.
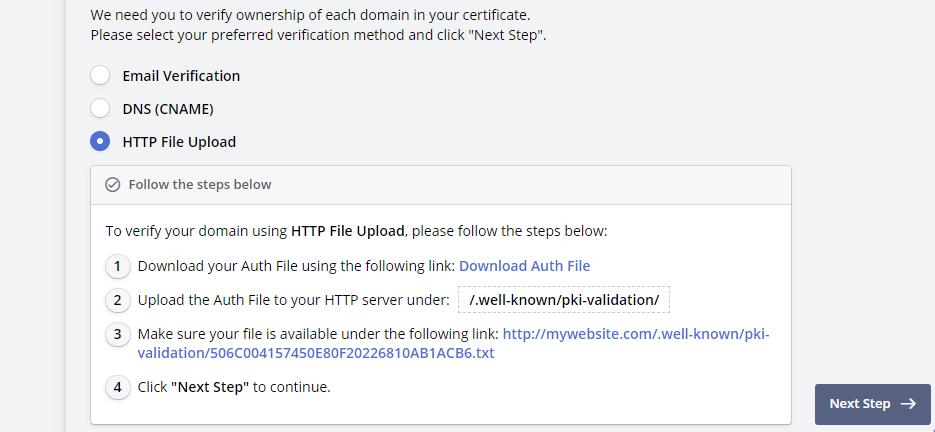
Choose whichever method suits you best to verify your domain ownership.
Feeling stuck? Let’s show you how to verify your domain using HTTP upload.
First, download the Auth File. Then log in to your cPanel, locate the file manager and click on it.
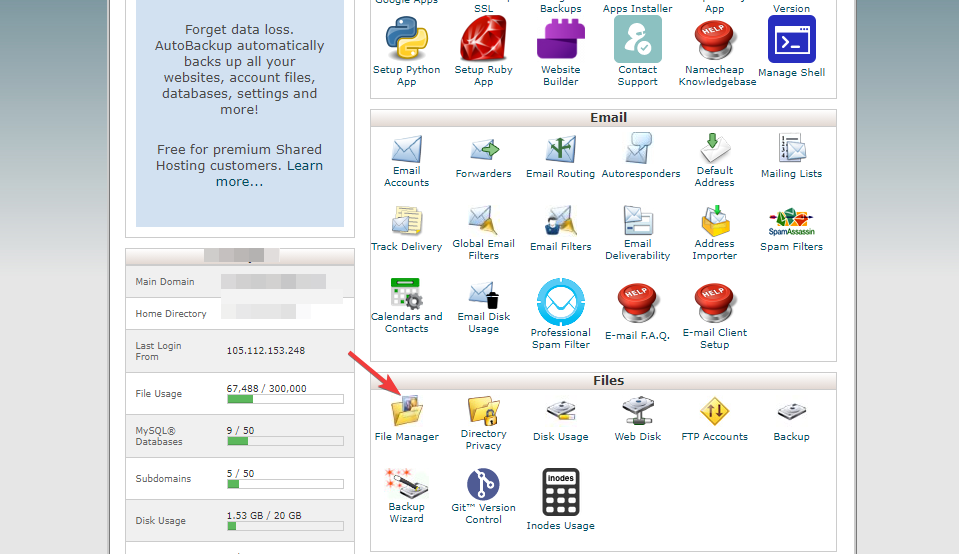
When you open it, look for the public_html folder

Open it as well. Then create a folder and name it .well-known
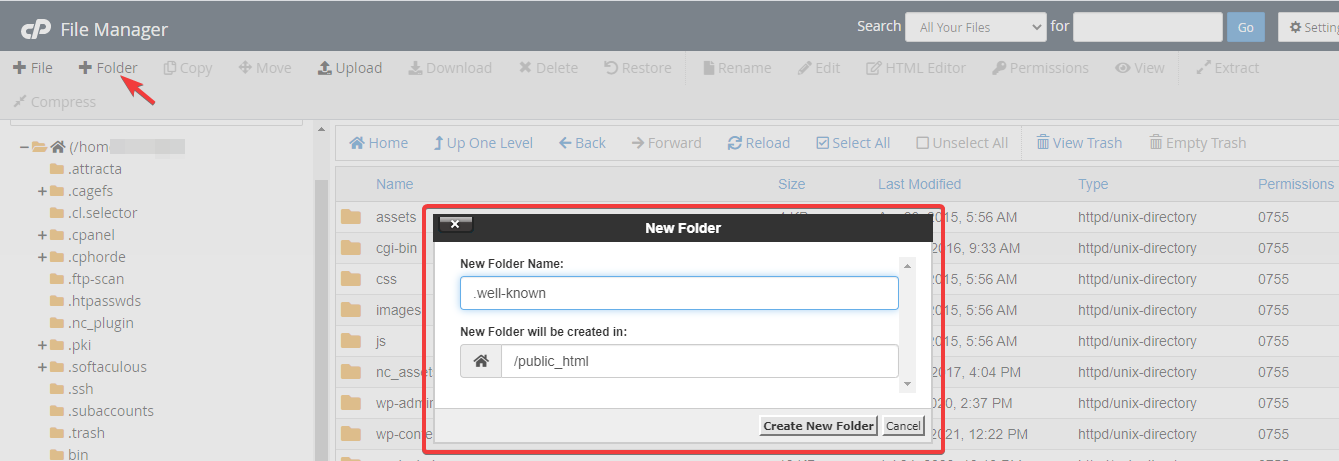
Open the folder you just created and create another folder, this time name it pki-validation. Finally, in this newly created folder, upload the Auth File you had earlier downloaded.
You are now ready to verify the ownership of your domain. To do that, head back to your SSL dashboard and hit the Verify Domain button.
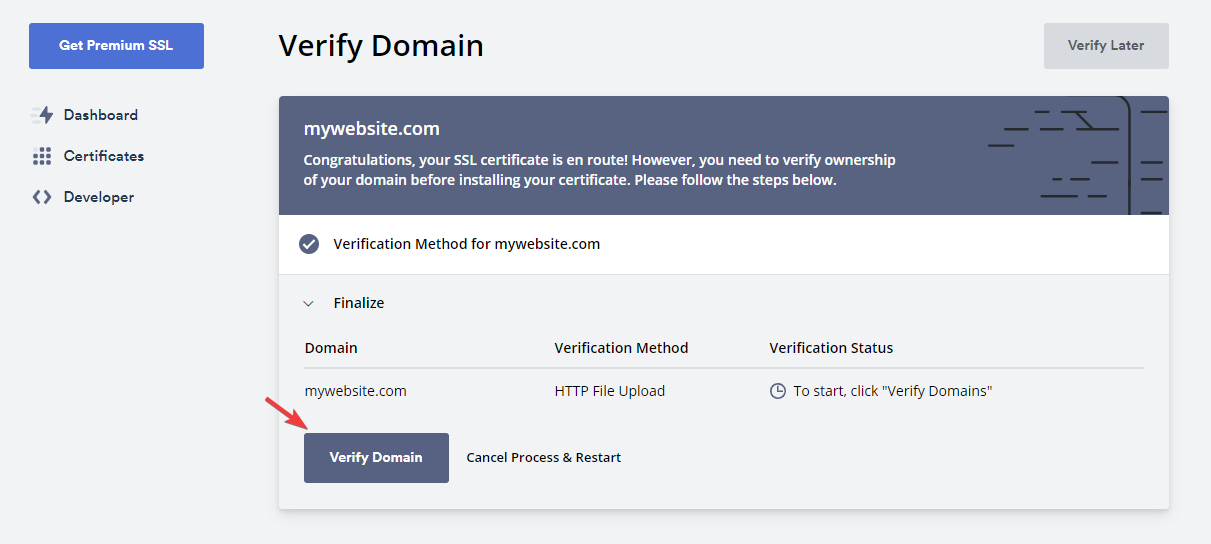
If you did everything properly, your domain will be verified, and your Certificate, Private key, and Certificate Authority Bundle generated. Download them and head to the next step.
The simplest way to go about this is to reach out to your hosting provider and ask for help installing the downloaded certificate.
But if you prefer to install the WordPress SSL yourself, that’s fine, and we will be glad to show you how to do so.
After you log into your cPanel, locate the SSL/TLS icon, right under the security section. This is where you get to setup SSL to WordPress.
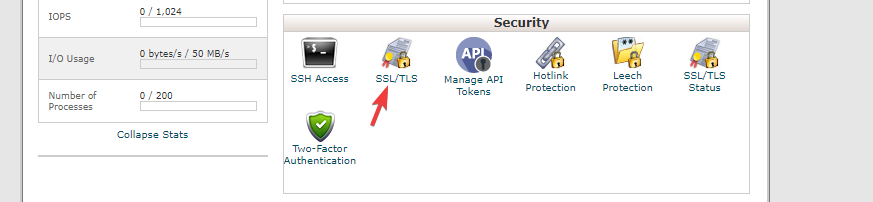
After clicking the icon, scroll down a little until you locate the Manage SSL Sites links.

Note: if you don’t see this option in your cPanel, you might have to reach out to your hosting provider for help.
After clicking the manage SSL sites link, you will be redirected to the SSL installation page.
To install, open the Certificate and Private key file you had earlier downloaded with Notepad – or any text processor of your choice. Then copy the content of each file and paste into the appropriate box.
Ensure that you copy and paste correctly like so:
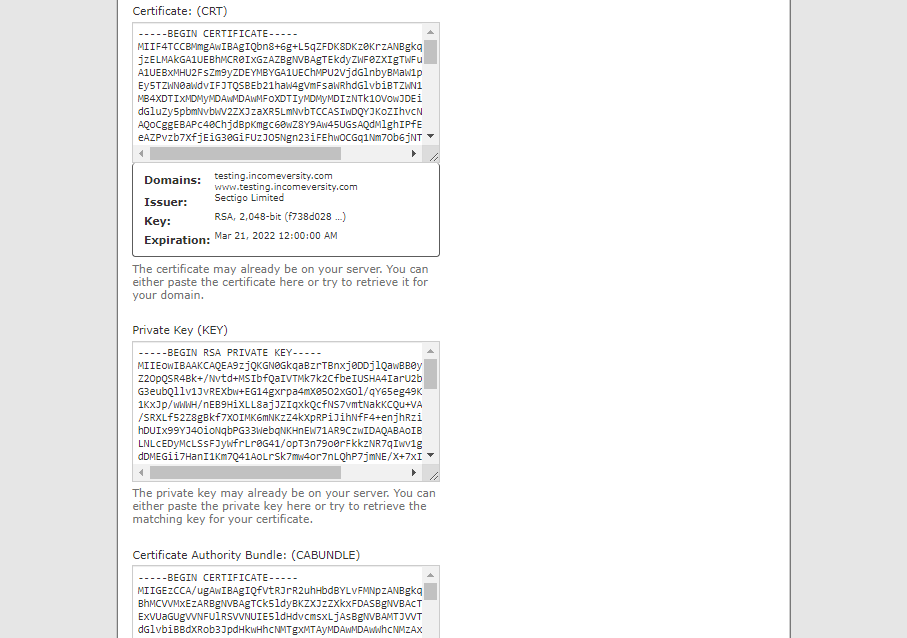
After pasting, hit the Install Certificate button at the bottom, and you are all set.
To ensure the SSL certificate you just installed works properly, you will have to force HTTPS on your pages, posts, media files, etc.
The simplest way to achieve this is by using a plugin: Really Simple SSL.
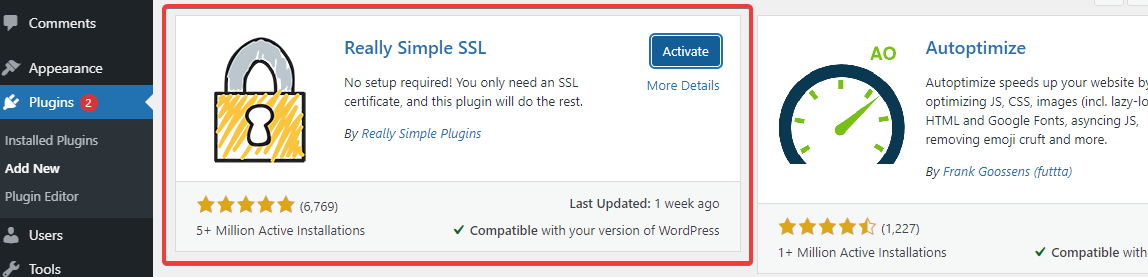
Install and activate the plugin on your website. After that, navigate to Settings >> SSL
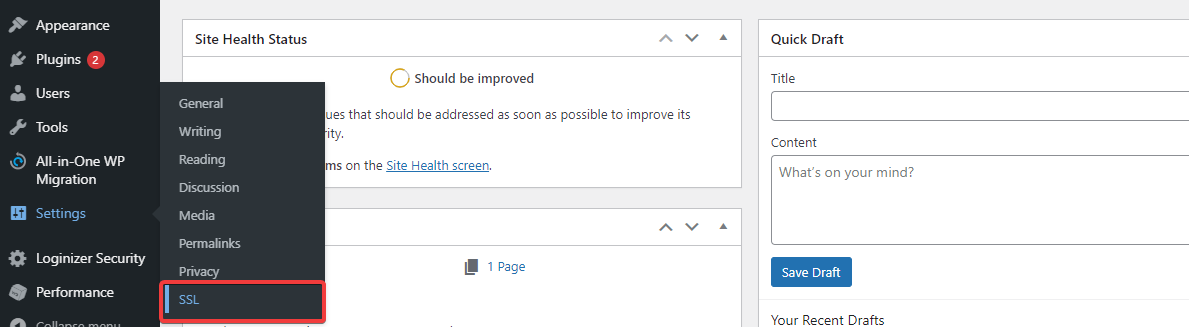
Once there, scroll down a little and click the Activate SSL button.

After activation, you will have successfully moved your WordPress website from HTTP to HTTPS.
After installing SSL to your WordPress website, the next important step is to redirect visitors attempting to access your site via HTTP to the HTTPS version of your site.
While the Really Simple SSL plugin we earlier talked about can help you with this task, it’s not efficient. And so we don’t recommend using it.
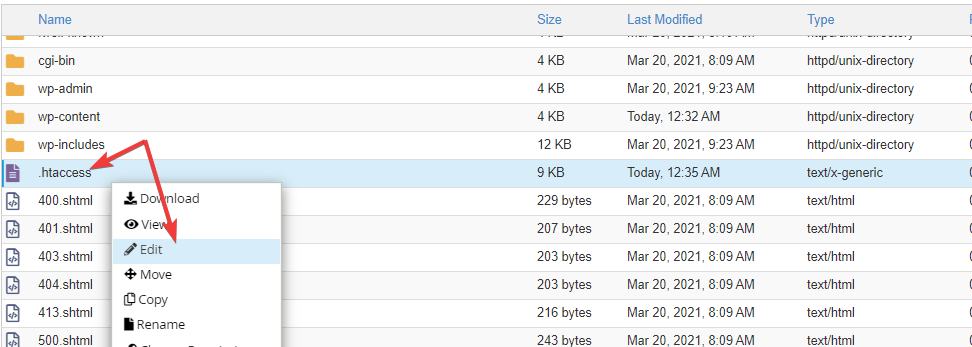
The best way to handle redirects is by making edits to your .htaccess file on your webserver.
To do so, log into your cPanel, open the file manager, and locate the file, right-click it and select Edit:
With the file opened and ready for editing, paste the following line of code, as shown below:
<IfModule mod_rewrite.c>
RewriteEngine On
RewriteCond %{HTTPS} off
RewriteRule ^(.*)$ https://%{HTTP_HOST}%{REQUEST_URI} [L,R=301]
</IfModule>
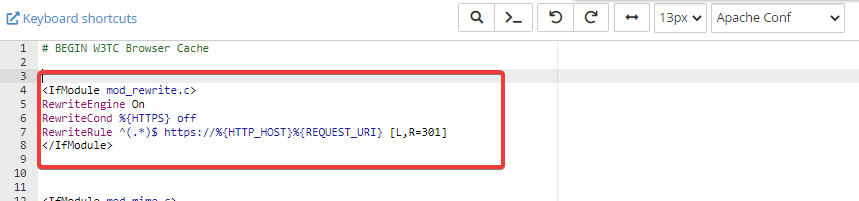
Then hit the Save Changes button, close out of the file and you are done.
Note: the technique we just showed you will only work if your server runs on Apache. If it runs on Nginx instead, you won’t see any .htaccess file but an Ngnix configuration file.
If that is the case, open it and paste this line of code:
server {
listen 80;
server_name example.com www.mywebsite.com;
return 301 https://mywebsite.com$request_uri;
}
Use your website’s actual URL in place of the mywebsite.com.
If your website was previously on HTTP, it’s important you let Google know about the changes
you made.
To do so, log in to Google Search Console and add your new HTTPS website
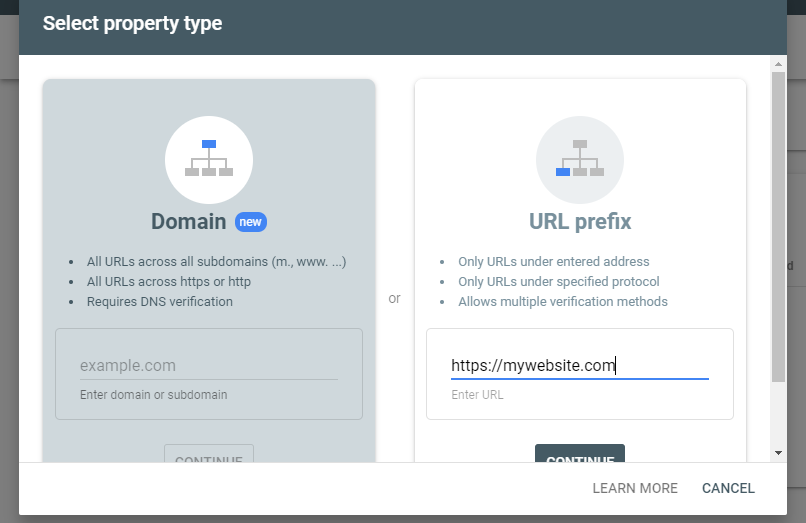
You will be asked to verify the ownership of your website. The verification process is very similar to the one we discussed in this post.
After verifying your website, create a sitemap for it and submit it.

That’s about it!
Installing WordPress SSL (HTTPS) to your website has several benefits, most of which we have discussed in this post.
Thankfully, doing so is relatively easy, and we’ve shown you how to go about it, plus the plugin you will need.