Physical Address
304 North Cardinal St.
Dorchester Center, MA 02124
Physical Address
304 North Cardinal St.
Dorchester Center, MA 02124

Are you having a hard time finding your WordPress login URL? Maybe you just installed WordPress on your domain, but can’t figure out how to login to your website.
If so, you have nothing to be worried about. In this post, we will show you how to login to WordPress via the admin URL.
Additionally, we will be showing you how to customize your website’s admin URL and even hide it if you wish to.
Let’s get to it, but first the table of content:
Every WordPress website comes with an admin area. This is where you get to control and manage your website. Think of it as your dashboard.
But to gain access to this dashboard, you need to find your WordPress admin login page. It looks like this:
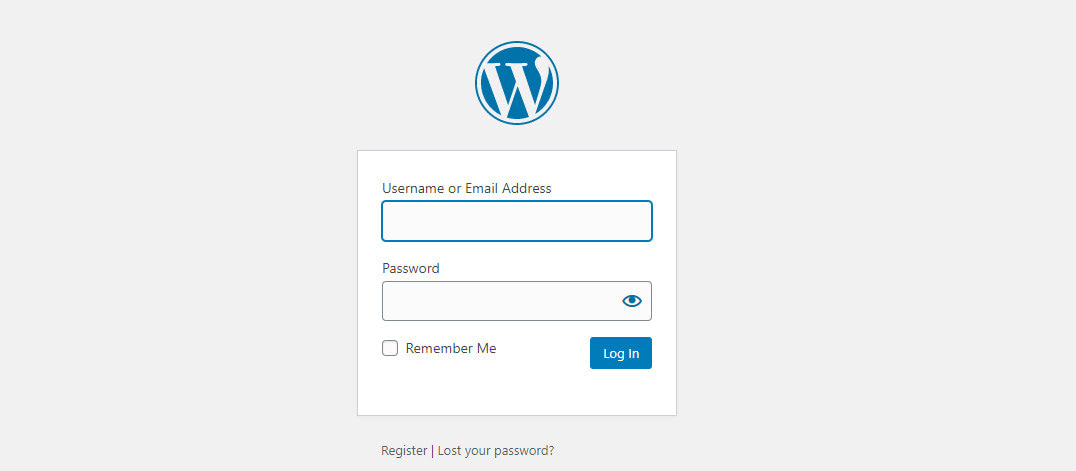
But how do you find this login page? Simply by typing your login URL in the browser.
So, the login URL – which is the same as the admin URL – is the link you type in a browser to locate your website’s admin login page.
This link takes different forms but has the same structure. You create it by appending any of the following to your website’s URL:
For example, let’s assume that your website’s URL is www.mywebsite.com
Your WordPress login URL can be any of these:
What if your website is hosted on a subdomain or subdirectory, what form will the login link take?
Now, before answering that question, let’s first make clear what a subdomain and subdirectory are.
Subdomains and subdirectories, as their name suggests, are websites that are subsidiaries of the main website. The only difference is their structure.
Subdomains are created prepending a name to the main domain. Eg:
blog.mywebsite.com
Whereas a subdirectory is created by appending a name with a forward slash to the main domain. Eg:
mywebsite.com/blog
For a subdomain, you find the login URL in the same way as you would for a regular website:
And for subdirectory
What if for some weird reason you can’t seem to remember your login URL? Well, there are a couple of solutions to that. The simplest of them is bookmarking the login link and opening it whenever you need it.
To do so on Chrome, hit “Ctrl + D” (on Windows) or “Cmd + D” on the Mac to bookmark the page.
For your login credentials, one easy way to remember it is to check the “Remember me” box like so:
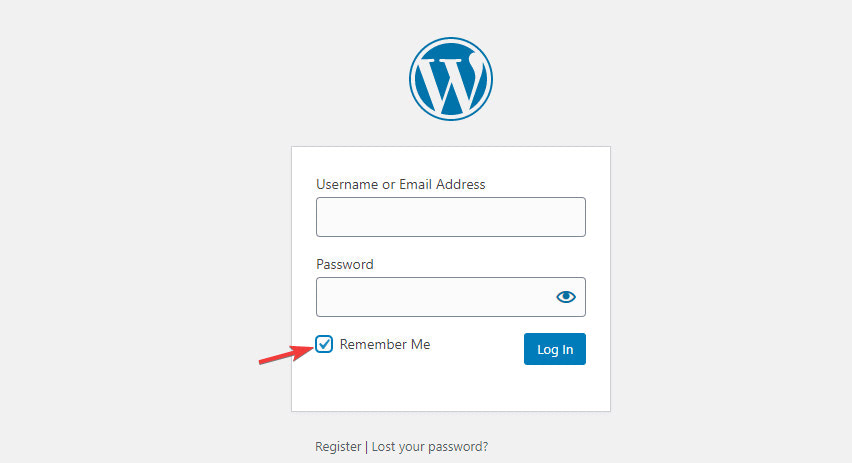
But what if you’ve forgotten your password and the “remember me” function isn’t helping? If that’s the case, click the “Lost your password” link as seen in the screenshot above.
A password reset link and instruction will be sent to your email. It’s then up to you to do the needful.
Has it dawned on you by now that just about anyone can find your WordPress login page? All they need to do is to append “wp-admin” to your domain URL, and your login page will show up.
Do you know the implication of that? A hacker, or anyone with a malicious motive, can easily log in to your WordPress website of yours.
Thus, to keep your website from the reach of hackers, you might want to change your login URL. Or even hide it altogether.
There are two ways to go about this: manually and via a plugin. We will be covering both shortly.
To manually obscure the link to your login page, you will need to locate your website’s wp-login.php file. This is where your site’s login credentials are stored. Once you’ve found it, edit and upload it, and you are all set.
Of course, that’s just a quick summary. Let’s now get into details.
Step #1: Download the wp-login.php file
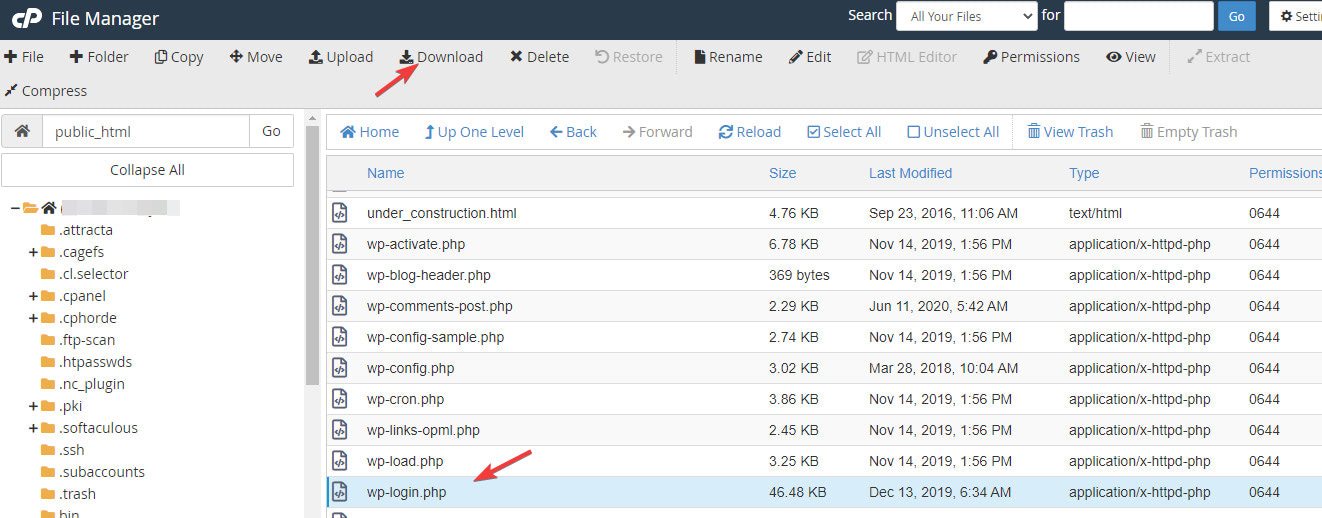
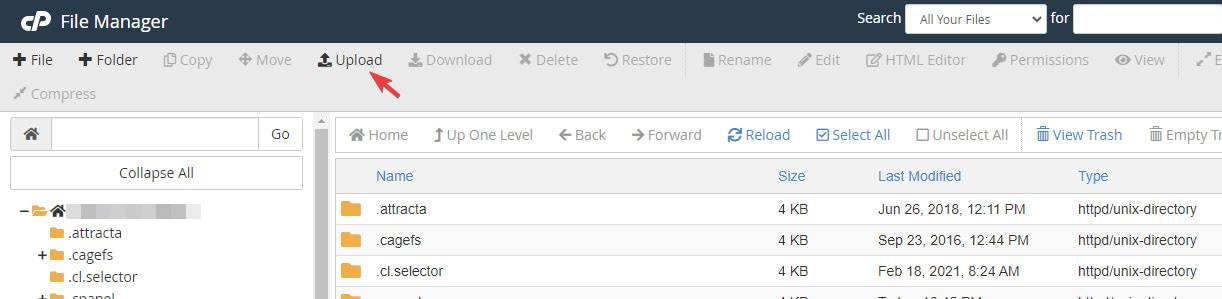
You will first need to login to your cPanel. Once logged in, click the File Manager icon.

Note: your cPanel interface might be different from the one you see above, but will surely have the same structure.
Next, open the public_html folder.

Once you’ve opened it, scroll down a little until you find the wp-login.php. Click it and then the “Download” link like so:
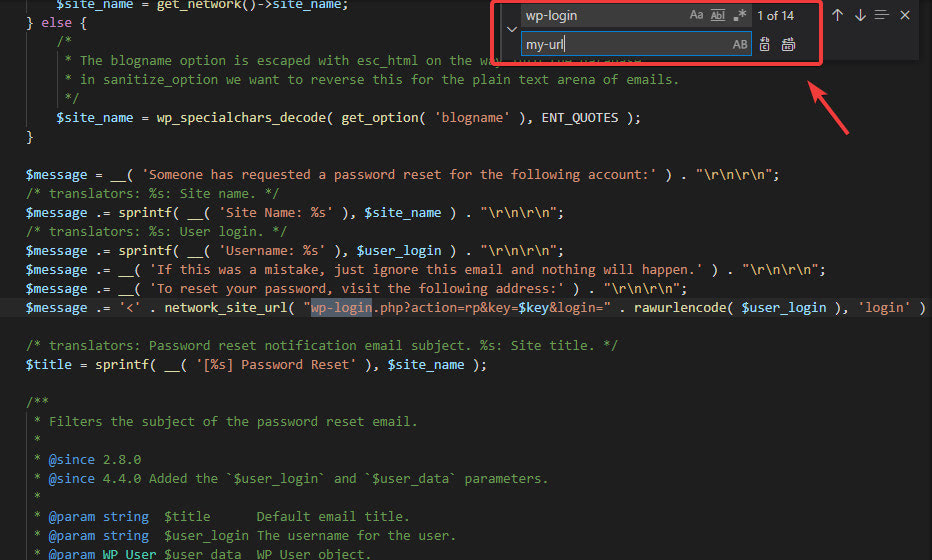
After downloading the file, right-click the wp-login.php file and delete it. Now open the downloaded file with any text editor: Visual studio code or Notepad ++ will do.
What you will want to do next is to replace all instances of “wp-login” with the new URL you want. For example “my-url”. The easiest way to do this is to run a find and replace function by hitting the Ctrl + F keys.
After the replacement, save the file with the name you used as a replacement.
For example, in this case we would save it as my-url.php
After the replacement, save the file, and upload it back to your file manager by clicking the Upload link.
Next, test if the new login URL is working by typing it in your browser:
mywebsite.com/my-url.php
If you did everything well, the login page should come up.
Why take the stress of changing your login to WordPress URL manually when a plugin can do it seamlessly?
WPS Hide Login is one plugin you can bank on to get the job done. You can use it to hide, or, if you want, change your website’s login URL.
To use this plugin, first install and activate it on your website. Next, navigate to Settings >> WP Hide login

On the WP Hide plugin page, scroll down a little until you find the Login url input field. This is where you will type in the new WordPress login URL you want to use:
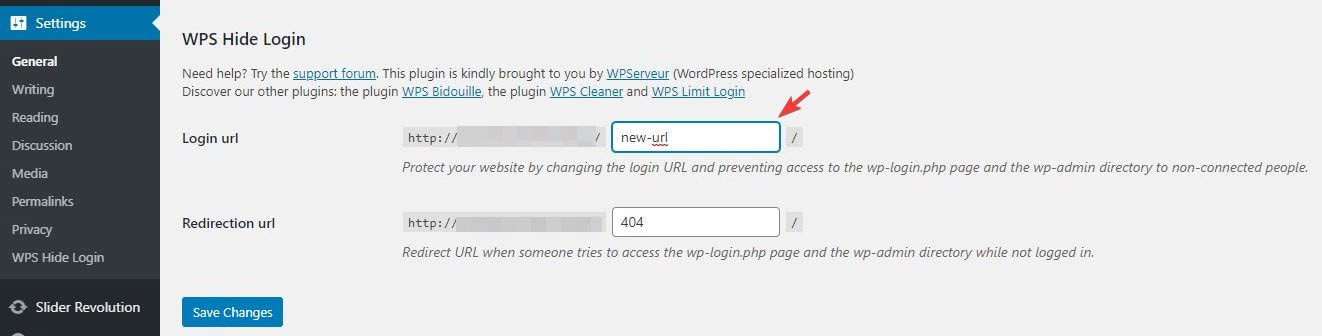
What if someone tries to log in to your dashboard via the standard login URL? By default, such a person will be redirected to your 404 page – that is, page not found. But if you don’t want this, replace “404” with the URL of your preferred redirect page.
When you are done, hit the Save Changes button.
Maybe changing the login URL to your website makes you a bit uncomfortable. Or, perhaps, you want to add an extra layer of security to your website even after changing the login URL.
Limiting the number of login attempts to your website will go a long way to help. This time around you won’t be editing your website’s codes but will use a plugin instead. And the plugin we recommend is Limit Login Attempts Reloaded
Ordinarily, WordPress allows unlimited login attempts, thus making your website susceptible to a brute force attack. This happens when someone tries to forcefully gain access to your website by guessing your password.
What Limit Login Attempts Reloaded does is to block the IP address of anyone that makes multiple, unsuccessful attempts to login into your website.
To use, install and activate the plugin. Then navigate to Settings >> Limit Login Attempts
Then set the lockout notification email, maximum number of login attempts, lockout duration, etc.
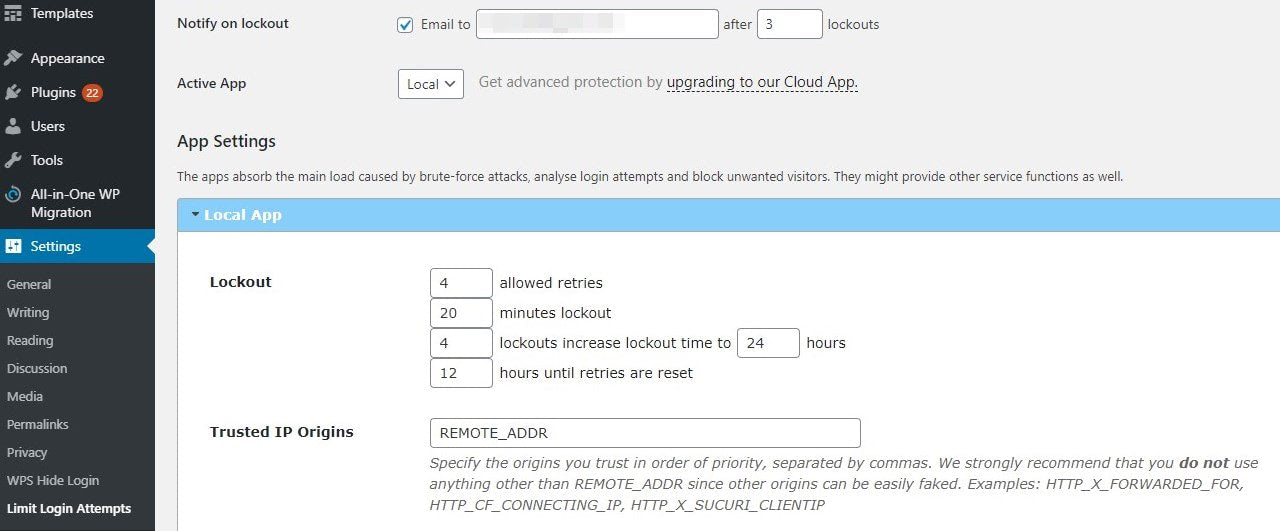
Don’t forget to save changes.
For WordPress to work well, cookies need to be enabled on your browser. If it is not, you will encounter a login error. It looks like this:
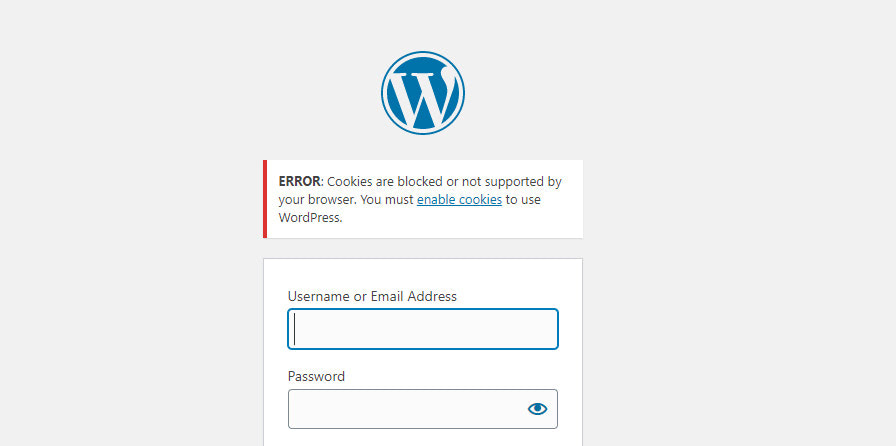
If you are currently experiencing this problem – or whenever you do – to fix it, you will have to enable cookies on your browser. That’s a no-brainer!
To enable cookies on Chrome, click on the 3-dot icon at the top-right corner, followed by Settings.
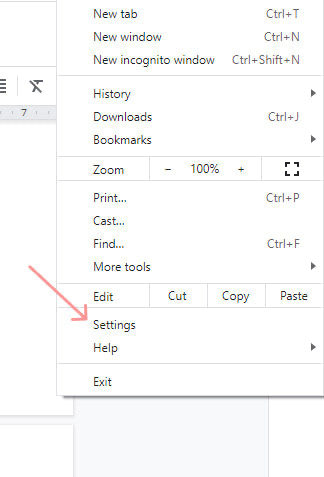
Next, navigate to Privacy and security >> Cookies and other site data. Then check the Allow all cookies data checkbox. And that’s it.
For Internet Explorer and Mozilla Firefox, the steps are almost the same.
Keeping your WordPress website away from the reach of hackers is one step in the right direction. And one easy way to do that is by making your WordPress Login URL inaccessible.
In this post, we’ve shown you how to find your admin URL and also how to hide it manually and with a plugin.