Physical Address
304 North Cardinal St.
Dorchester Center, MA 02124
Physical Address
304 North Cardinal St.
Dorchester Center, MA 02124
WordPress widgets give the developer a tool to create functionality for the site. Then these widgets can be displayed on any widgetised area of the theme by the site admin. These widgets can have a wide variety of functionality from displaying static text to complex operation like logging into some external system and fetching information from there.
WordPress provides good infrastructure to create widgets easily by abstracting the things required for a widget to function within WordPress and so that the developer can concentrate on coding only the functionality of the widget. The widget can also have options defined to customize the behavior of the widget. The WordPress admin can also add two different instances of the same widgets either in the same or different widgetised area of the theme. In this article we are going to see how the admin can drag drop the widgets and how can we develop a WordPress widget with options.
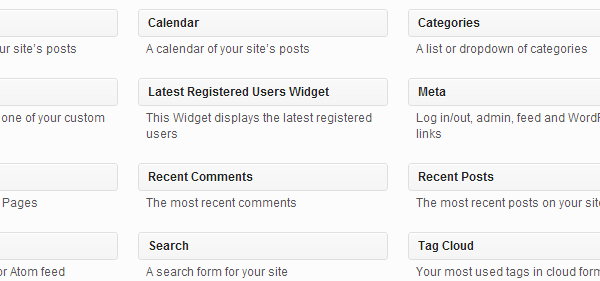
Let’s start by checking how the WordPress admin can add registered widgets to his site from the WordPress admin. When we do a default installation of WordPress, the core WordPress installation itself has some widgets which can be directly used by the site admin. You can see all the registered widgets for your site at Appearance->Widgets in your site admin as seen below:

You can easily drag drop any one of the widgets on the widgetised areas shown on the right and then add the settings. Below I am going to drag drop the text widget and add some settings to it so that it will be seen in the sidebar.

Let’s start by creating our first WordPress widget. In this widget we are going to show the latest registered users of your WordPress site.
To create a widget in WordPress you have to create a class which will derive from WP_Widget which provides the functionality to create a widget.
The basic structure of our class will be as follows:
[php]
class Latest_Registered_Users_Widget extends WP_Widget {
public function __construct() {
parent::__construct(
‘Latest_Registered_Users_Widget’,
‘Latest Registered Users Widget’,
array( ‘description’ => ‘This Widget displays the latest registered users’ )
);
}
public function widget( $args, $instance )
{
}
public function update( $new_instance, $old_instance )
{
return $new_instance;
}
public function form( $instance )
{
}
}
[/php]
In the above code we have created a class Latest_Registered_Users_Widget which derives from WP_Widget and it then overrides some of the functions. We will see the details of the function below in the article, for now we can just have a blank implementation for them. In the constructor we call the constructor of the parent class WP_Widget in which we pass the arguments the id of the widget (this must be unique), the name of the widget (this will be displayed on the configuration page), and the widgets options in which we pass the description of the widget.
With this our basic structure of the widget is complete.
Once we have completed the basic class of our widget we can register it with the WordPress system so that it will be seen in the widgets list in the WordPress admin and it can be dragged & dropped on the widgetised area.
To register your widget with WordPress you will have to add the following code:
[php]
add_action( ‘widgets_init’, create_function( ”, ‘register_widget( "Latest_Registered_Users_Widget" );’ ) );
[/php]
In this you are basically hooking to the widgets_init hook of WordPress and then calling register_widget function on our widget.
Once this is done and all has gone correct you should be able to see your widget in the WordPress admin as follows:

You can even drag & drop you widget on a widgetised area.
Once we have got our widget registered now let’s add some options to our widget. To add options to our widget we have to add code to our form function.
The code for it is as follows:
[php]
public function form( $instance )
{
$title = isset( $instance[ ‘title’ ] ) ? $instance[ ‘title’ ] : ‘Latest Registered users’;
$numberofusers = isset( $instance[ ‘numberofusers’ ] ) ? $instance[ ‘numberofusers’ ] : ‘5’;
?>
<p>
<label for="<?php echo $this->get_field_id( ‘title’ ); ?>"><?php _e( ‘Title:’ ); ?></label>
<input class="widefat" id="<?php echo $this->get_field_id( ‘title’ ); ?>" name="<?php echo $this->get_field_name( ‘title’ ); ?>" type="text" value="<?php echo esc_attr( $title ); ?>" />
</p>
<p>
<label for="<?php echo $this->get_field_id( ‘numberofusers’ ); ?>"><?php _e( ‘Number of users to display:’ ); ?></label>
<input class="widefat" id="<?php echo $this->get_field_id( ‘numberofusers’ ); ?>" name="<?php echo $this->get_field_name( ‘numberofusers’ ); ?>" type="text" value="<?php echo esc_attr( $numberofusers ); ?>" />
</p>
<?php
}
[/php]
The argument to this function is the instance variable which holds the values for the current instance of the widget.
In this function we check if the title and number of user’s values has been set (by a previous update done) by the admin. If they are been set then we will display those values or otherwise we will display the default values which we have defined.
Once that is done we add the label and text field for the two options using the functions get_field_id and get_field_name which help to generate the id and name for an option.
Once we have added the options and if we see our widget in the admin the options will be seen as follows:

Once we have displayed the widget options the user can change the options and can click on save. We have to implement the update function to update the widget options.
The code for it is as follows:
[php]
public function update( $new_instance, $old_instance )
{
$instance = array();
$instance[‘title’] = strip_tags( $new_instance[‘title’] );
$instance[‘numberofusers’] = strip_tags( $new_instance[‘numberofusers’] );
return $instance;
}
[/php]
The update function gets the $new_instance and $old_instance as input parameter. Here if you want to do some processing by taking the $old_instance value then you can do that also. I have just taken the new values which the user has entered and passed those to be saved. Now you should be able to save the widget options by clicking save as follows:

Once we have got the options now we have to write the actual code of the widget which will display what to be shown on the front end. To do that you have to implement the function widget as follows:
[php]
public function widget( $args, $instance )
{
extract( $args );
$title = apply_filters( ‘widget_title’, $instance[‘title’] );
echo $before_widget;
if ( ! empty( $title ) )
echo $before_title . $title . $after_title;
$args = array(
‘orderby’ => ‘user_registered’,
‘order’ => ‘DESC’,
‘number’ => $instance[‘numberofusers’]
);
$latest_users = new WP_User_Query( $args );
if ( !empty( $latest_users->results ) )
{
echo ‘<ul>’;
foreach ( $latest_users->results as $user ) {
echo ‘<li>’ . $user->display_name. ‘</li>’;
}
echo ‘</ul>’;
}
echo $after_widget;
}
[/php]
In this we get the arguments and the instance as arguments to the function. Then we get the title and display it on the screen. Then with the help of WP_User_Query I get the latest registered users. I limit the number of users by the number selected in the widget option.
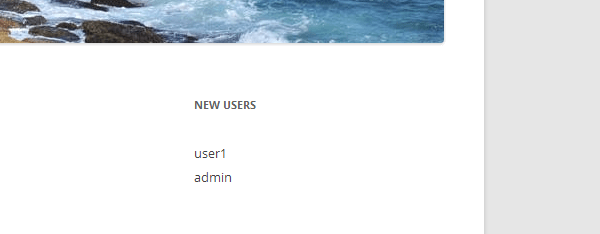
Now if we go to the front end we should see our widget output as follows in the sidebar:

Widgets in WordPress make it very easy for the site admin to add functionality where he wants in his theme. Some themes have a lot of widgetised areas so that a lot of widgets can be used on them. WordPress also makes it very easy and quick to develop new widgets. So have fun while creating your next WordPress widget.