Physical Address
304 North Cardinal St.
Dorchester Center, MA 02124
Physical Address
304 North Cardinal St.
Dorchester Center, MA 02124

Illustrations by Absurd Illustrations.
One of the challenges beginner webmasters struggle with is how to install WordPress. Ironically, installing WordPress is very easy, and doesn’t require any coding skills.
Of course, it can be overwhelming at the first attempt – that’s normal. It was, after all, for most of us.
In this guide, we will be running you through a detailed WordPress installation process.
Our goal?
To help you learn how to install WordPress on:
Also, you will get to learn how to move a website you installed locally on your machine online.
There are times you will want to install WordPress locally on your computer. Yes, doing so means that no one but you – and anyone that has access to your computer – will see the website. That is to say, your website will be offline.
But why would you want to install WordPress on your machine if no one will see it? There are a lot of reasons.
First, if you are just starting out with WordPress and don’t have a budget for hosting and domain name, installing locally will make a lot of sense.
Second, if you want to build a custom WordPress website from scratch using drag-and-drop website builders instead of a theme, doing so online is impractical. As such, your best bet is to build offline, test and tweak, and then deploy the finished design online.
Also, you might want to test a new plugin or theme on your website. Doing so on your live website is risky: your website might experience glitches, or, worse, crash. You sure don’t want that, do you?
With all that said, here are the steps to installing WordPress on your computer (Windows).
WordPress requires a PHP environment, plus a database solution to work. Unfortunately, your computer doesn’t provide any of them. Thus, prompting the need for XAMPP. This is a free software that provides all that is needed to run WordPress locally.
Do bear in mind that XAMPP isn’t the only solution you can use; Wamp, Local by Flywheel, Vagrant, will all work.
We chose XAMPP because it is very popular and fairly easy to use. Alright, enough of the belaboring – let’s get into details.
Now, head over to XAMPP’s official website to download the software.
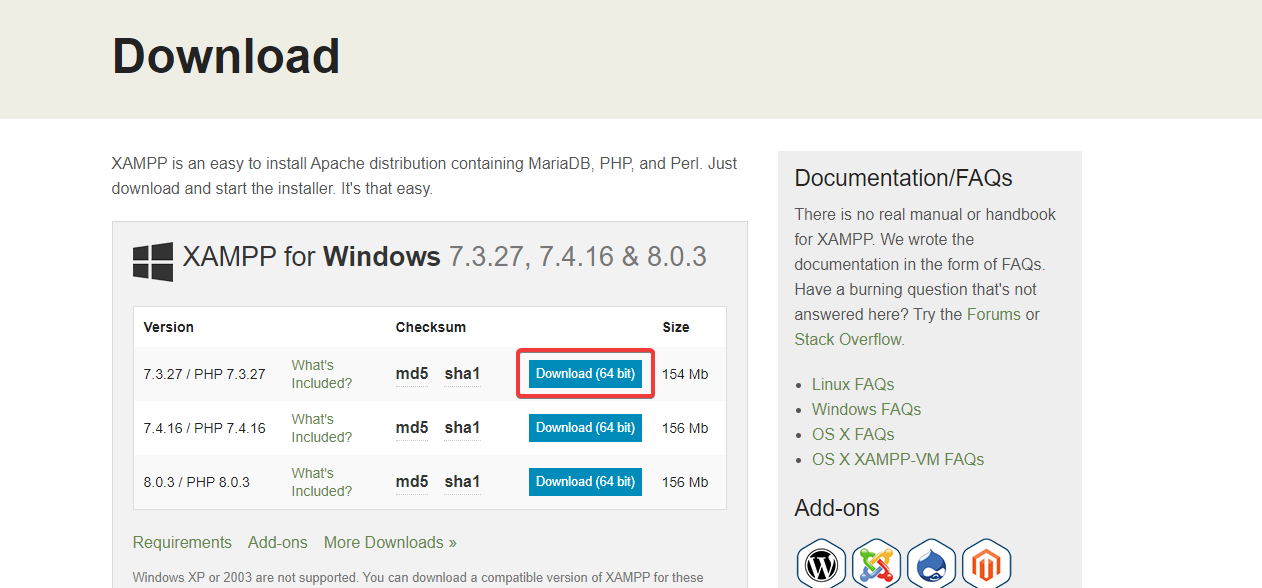
Once you’ve downloaded the software, install it right away on your machine. If you run into difficulties during the installation process, XAMPP has a helpful resource you might want to consult.
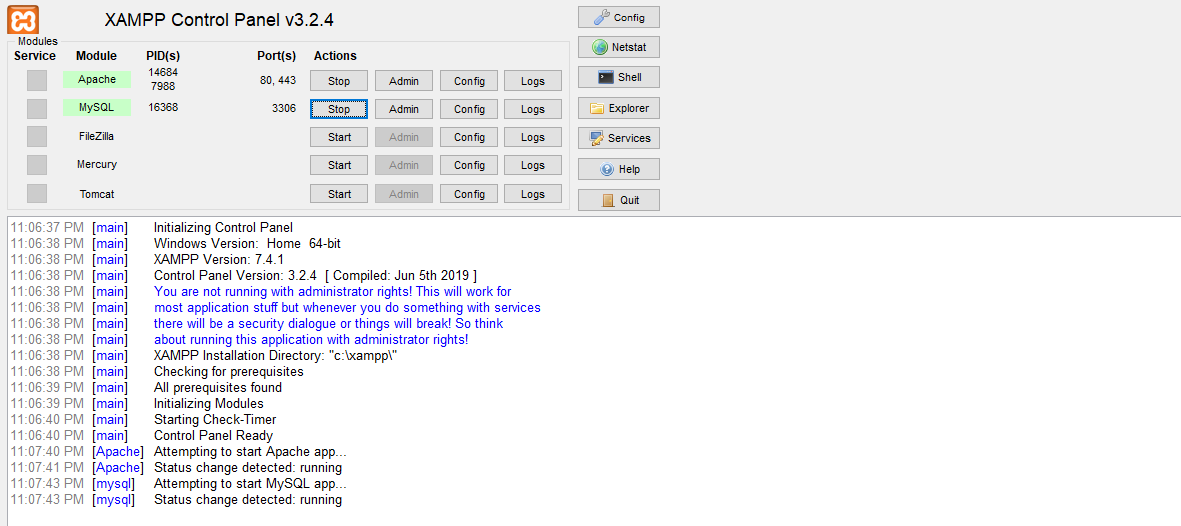
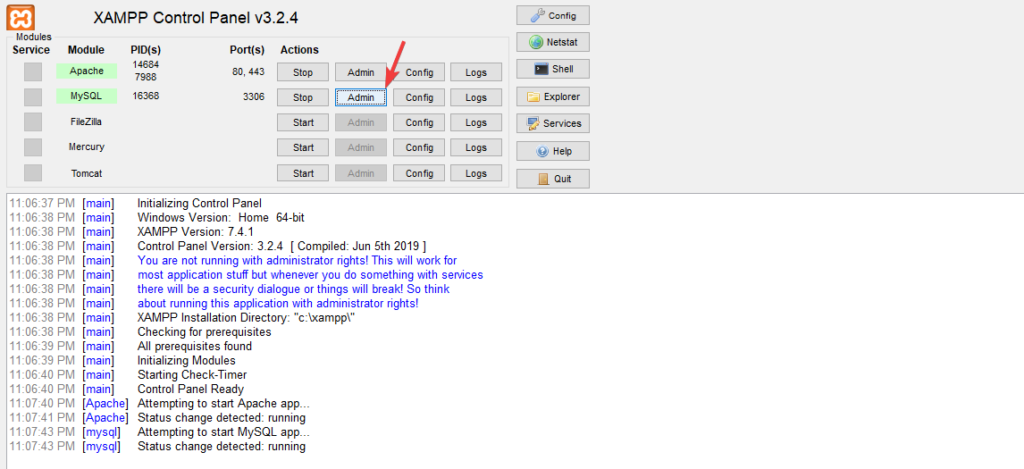
After you must have completed the installation process, launch Apache and MySQL from the XAMPP dashboard by clicking their Start button like so:

To know if you correctly launched Apache and MySQL, their buttons should change to Stop, and a green light will overlay them like so:
Now that you have XAMPP up and running, the next step – which is the easiest of all – is to download the latest version of WordPress by heading over to the official download website.
The downloaded file will be zipped. If it is not, you apparently did something wrong.
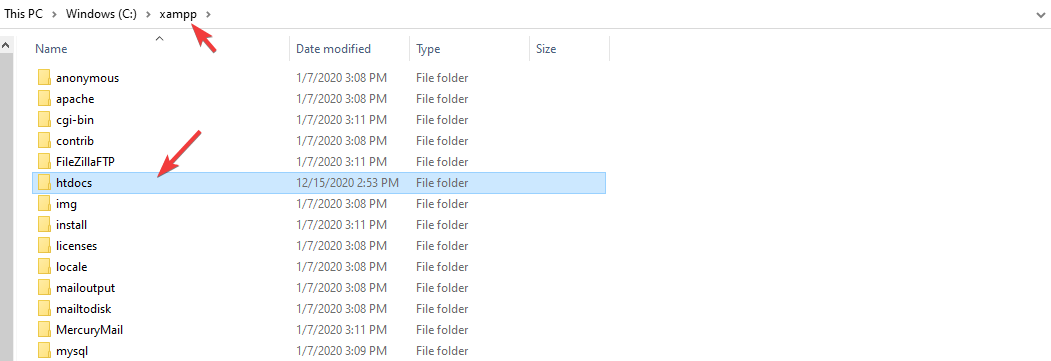
To install WordPress on your machine, first, open your hard drive like so:

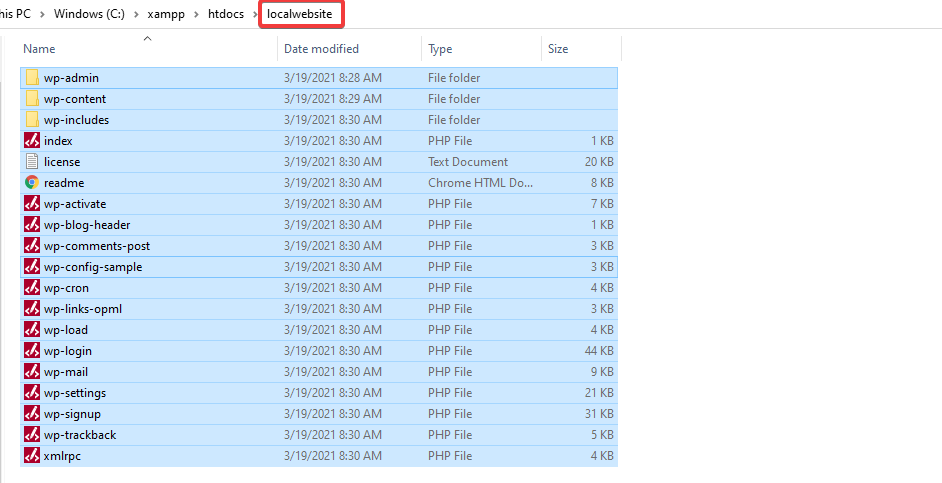
When you have opened it, locate the xampp folder, open it, find the subfolder named htdocs, and open it as well.
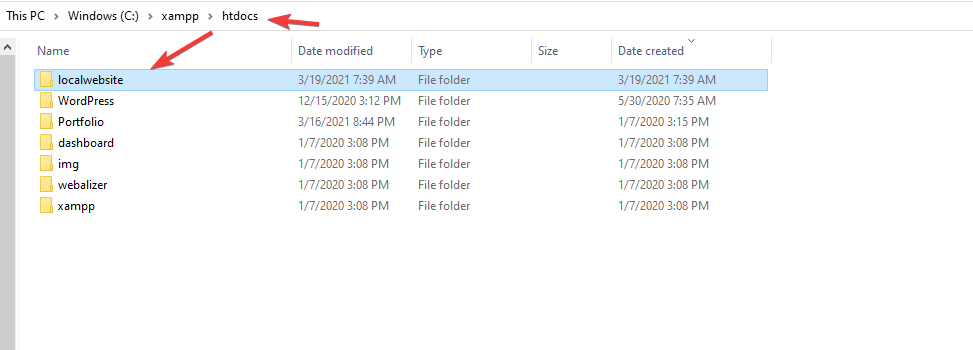
Next, create a subfolder in the htdocs folder, name it whatever you want. This is the name that you will use to access the website you are about to create locally.
For this example, we used localwebsite as the name for ours.
With that settled, head over to your download folder – or whatever folder you kept the zipped WordPress file you had earlier downloaded. Remember?
If you haven’t downloaded it yet, head back to step #2 and do so.
Once you’ve located the zipped file, open it. In it, you will find a subfolder named wordpress. Open this subfolder as well. Select all files and folders by hitting the Ctrl + A buttons. Then copy all of them.
Now head back to the WordPress installation folder you had earlier created, paste the files you copied into it like so:
At this point, you are ready to create a database on which your new WordPress website will run.
Like we earlier mentioned, WordPress needs a database to work – locally or online. Thus, creating a database is an important step in the WordPress installation process.
To do so, head back to XAMPP, click the Admin button relative to MySQL like so:
Clicking this button will launch the phpMyAdmin page on your browser. This is where you get to create a database for your website.
Next, click the Databases button, then enter a name you want for the database you are about to create. This name can be anything – only ensure you note it down because you will need it later on.
In this example, we chose the name “localdatabase”.
After inputting a name, hit the create button:

With your database ready, the next step now is to set up WordPress.
To do so, open a new tab in your browser, and in it type in the following URL:
localhost/localwebsite
Note: we used “localwebsite” because that is what we called our WordPress installation folder. That means if you called yours something else, use it here.

Once you’ve done that, hit the Enter key. This will launch the WordPress Setup Configuration page. On this page, you will be asked to select a language.
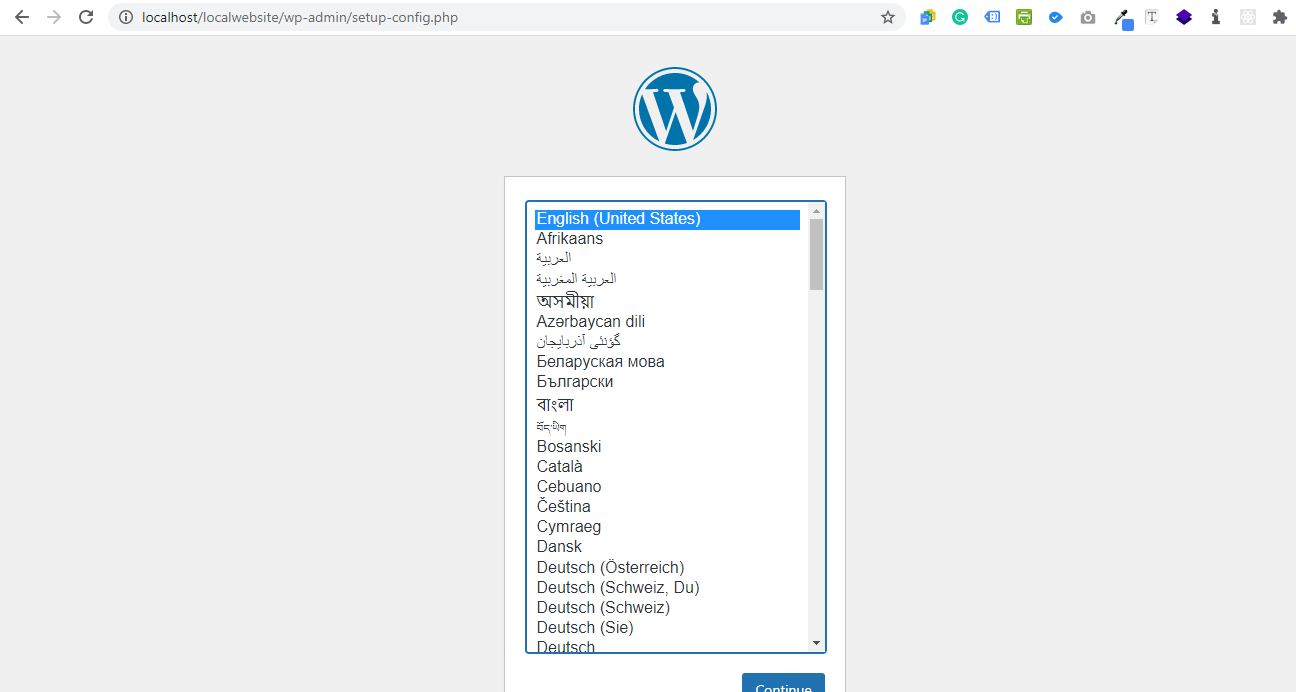
We chose English (United States) – pick whatever hits the spot for you.
After that, you will be redirected to the database setup page. There, click the Let’s go button like so:
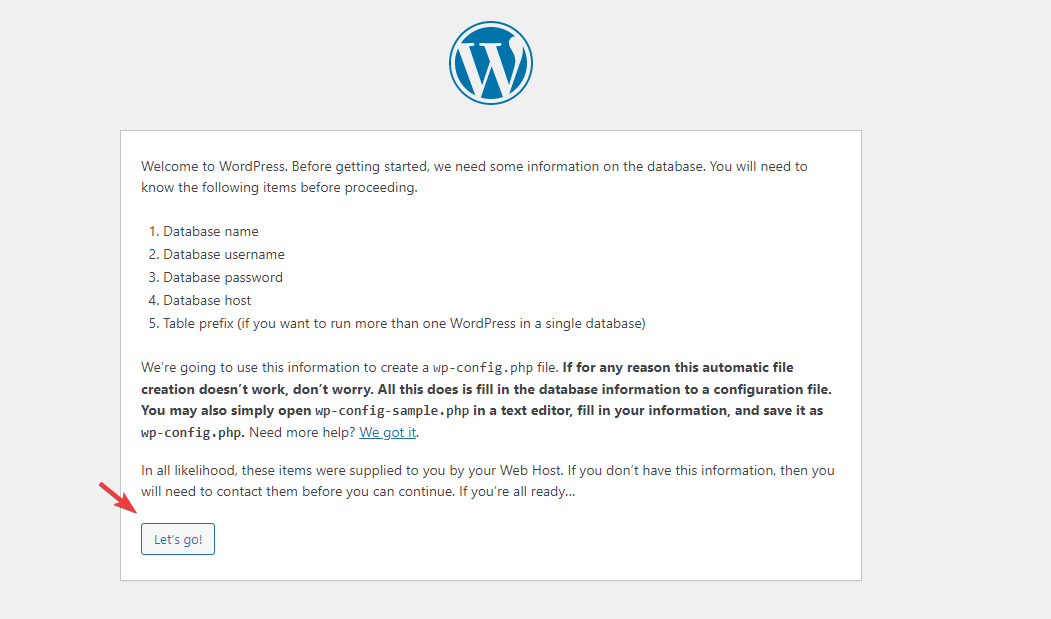
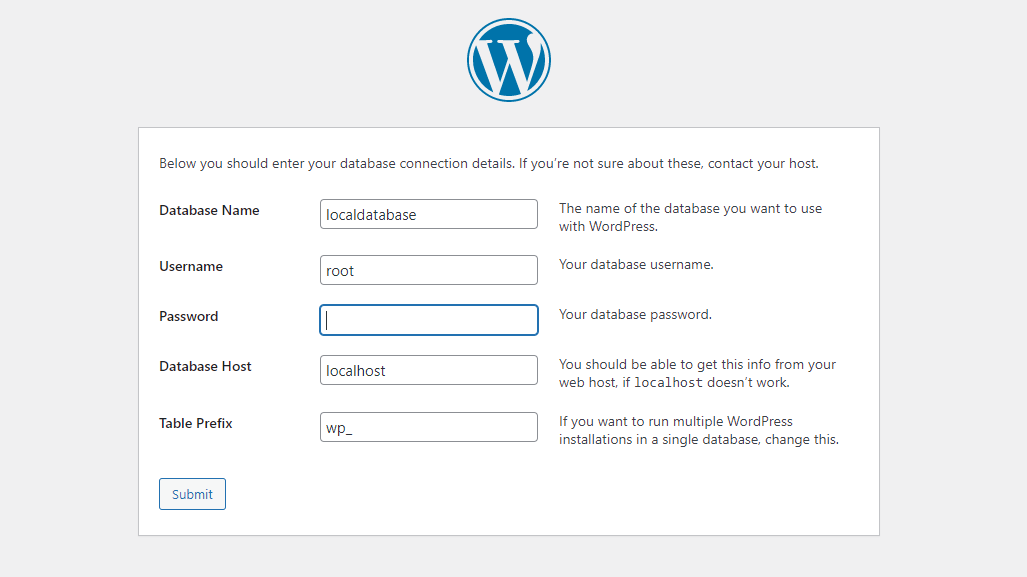
On the next page, type in your database details as follows:
Before hitting the submit button, you need to make edits to your website’s wp-config-sample.php file. If you don’t, you will run into problems the instant you click the submit button.
So, head back to your installation folder once again. There, locate this file:
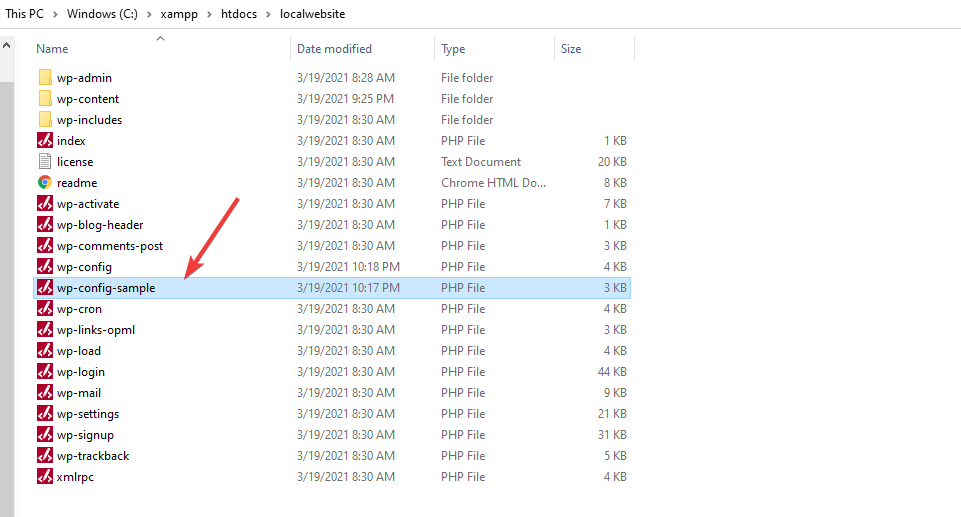
Open the file with any text editor of your choice. It will look like this:
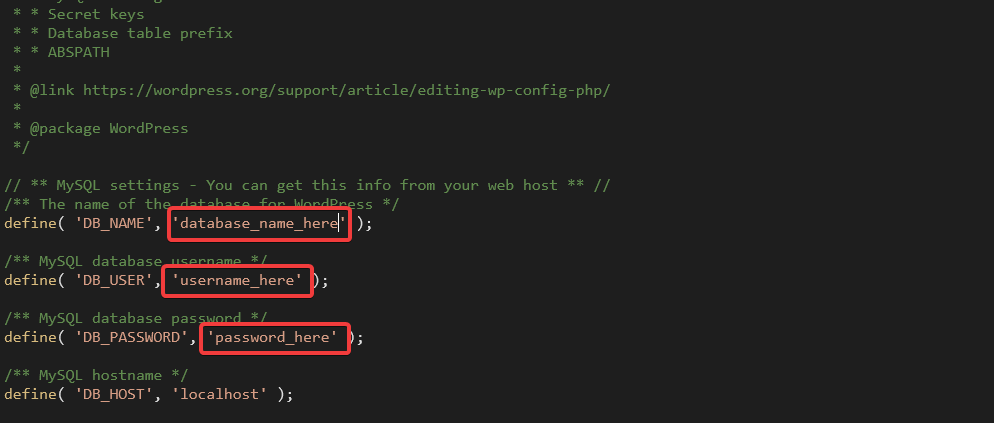
Edit this file by changing the database name to “localdatabase” (or whatever name you used), username to “root”, and password left as blank. Leave the hostname the way it is.
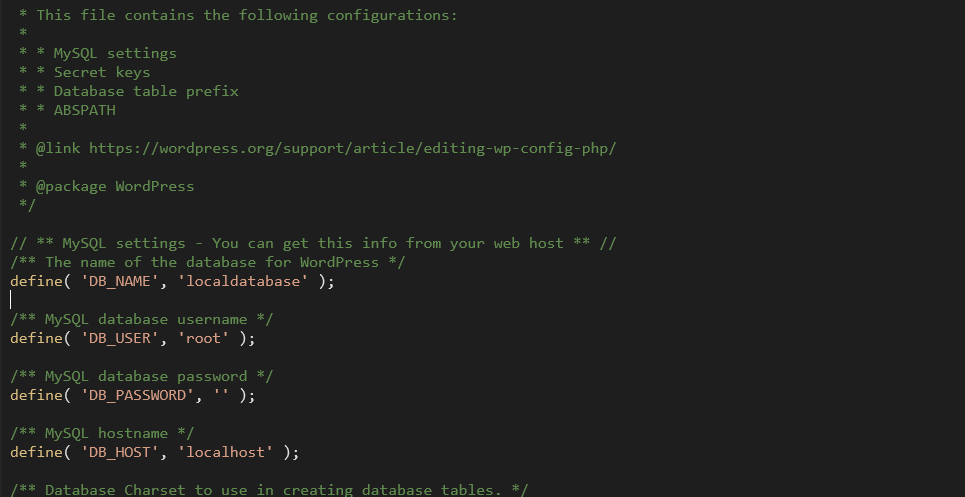
Save the file. Now head back to the WordPress database setup page you had earlier left off.
Hit the Submit button.
Upon click, the following page will pop up:
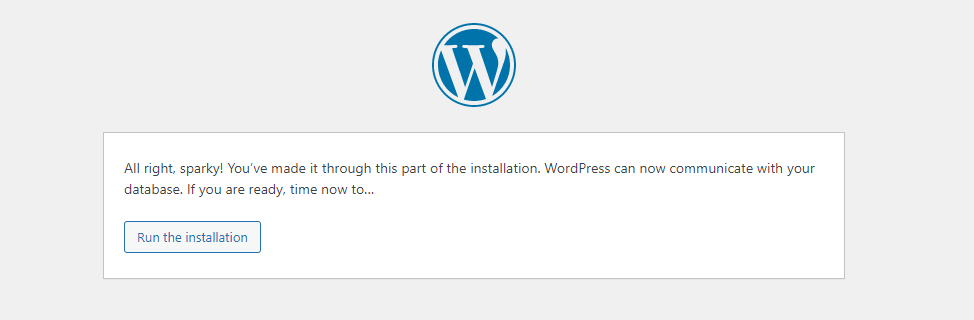
Click the Run the installation button.
On the next page, provide the details you wish to use to operate your website. That is website title, username and password, and admin email.

Note: the username and password used here are completely different from the ones you used in setting up your database.
With that said, click the Install WordPress button, and you are all set.
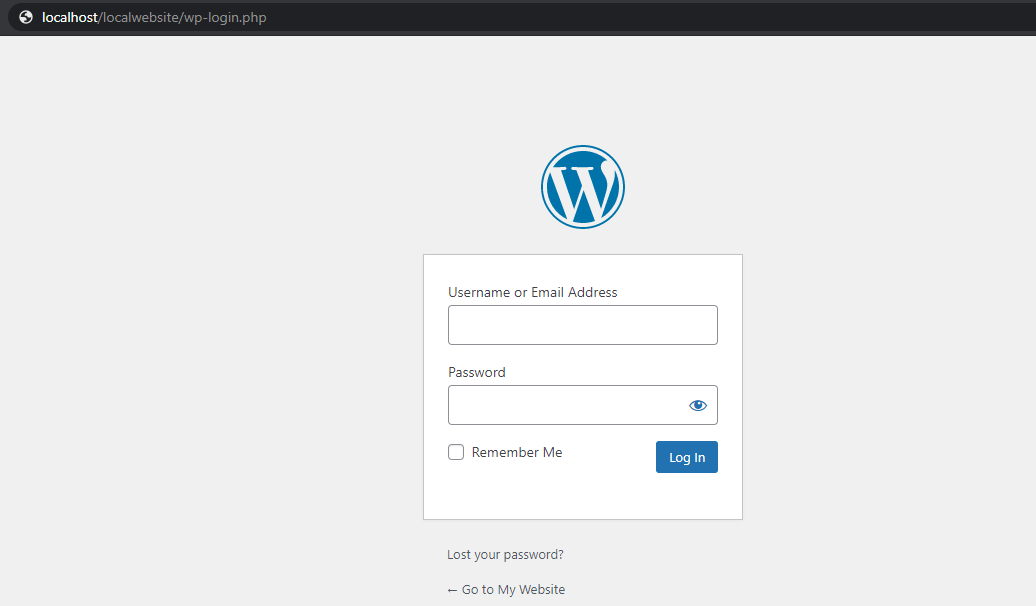
The next thing you might want to do is to log into your new website’s dashboard. To do so, type the following into your browser:
localhost/localwebsite/wp-login.php
Log in with the credentials you created earlier. And that’s it.
What if you want to push the website on your local machine online, how do you go about it? Not to worry, we will get to that later.
If you are pressed for time and want to get your website online as soon as possible, running WordPress installation locally won’t make much sense. As such, the best course of action is to install it directly on your domain.
But before doing that, your hosting and domain name needs to be ready.
With that caveat out of the way, here are the steps to installing WordPress via cPanel.
First things first: log into your cPanel. Not sure how to do that? Let’s show you.
The thing is, there is no single way to do that, as this depends on your hosting provider. But the standard way to do this is by appending “:2083” to your domain.
For example:
www.mywebsite.com:2083
If you have your cPanel login credentials, use them. But if you don’t, reach out to your hosting provider for help.
Once logged into your cPanel, look for the WordPress auto-installer icon.

Now, depending on your cPanel’s interface, the WordPress installer might be located elsewhere. So bear that in mind.
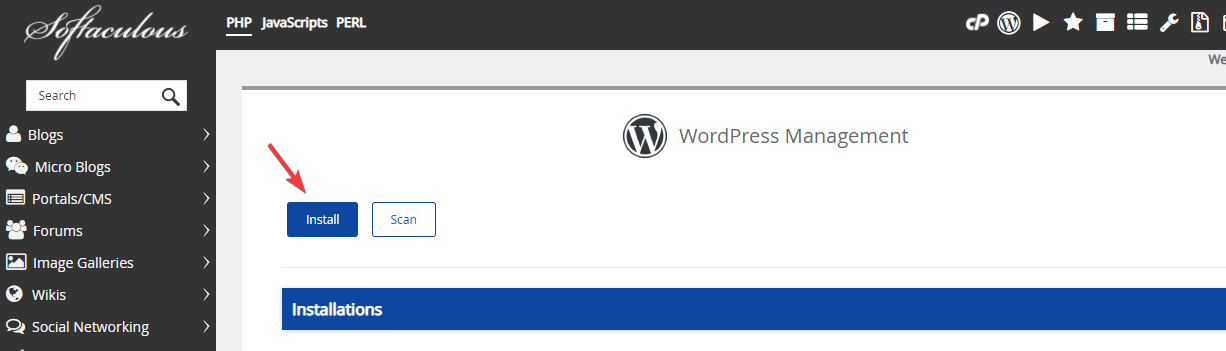
Next, click on the icon. You will then be redirected to the Softaculous app page. There, click the Install button.
After that, choose your installation URL, set a name for your new website, note down your admin login username and password, scroll down a little, and hit the Install button.
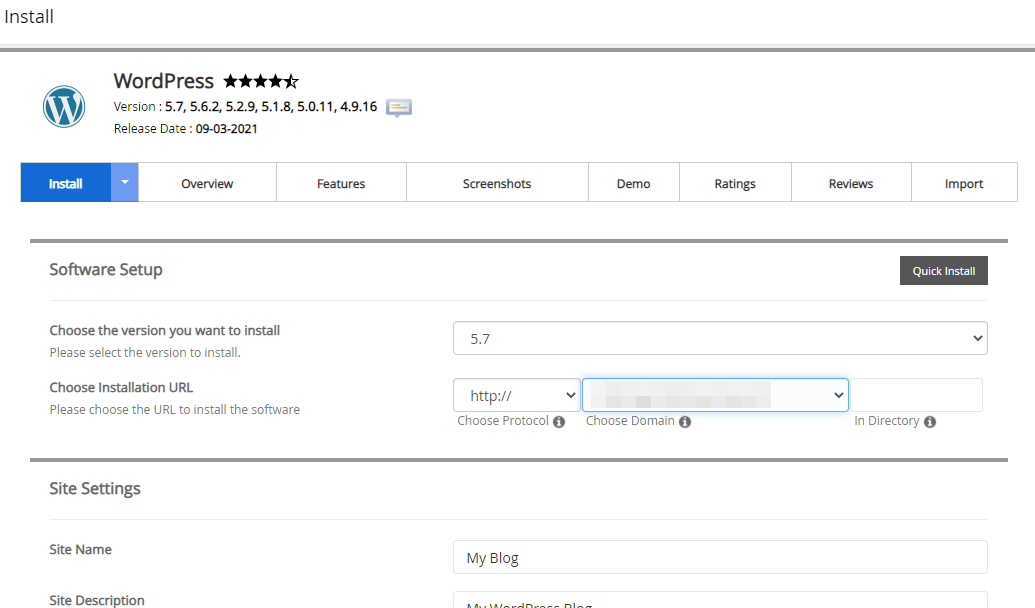
You are done!
To log into your dashboard, you can either follow the administrative URL in the cPanel or, as we told you earlier, append wp-login.php with a forward slash to your domain name.
Example: www.mynewwebsite.com/wp-login.php
We promised to show you how to move your locally installed website online, didn’t we?
It’s time we made good that promise, so here are the steps to do so.
You will need some sort of migration plugin to get this job done. While there are lots of plugins you can use, we will be using All-in-One WP Migration because it is simple to use.
Download and install the plugin both on your local website and the one you have online.
After that, log back into your local website, navigate to All-in-One WP Migration >> Export
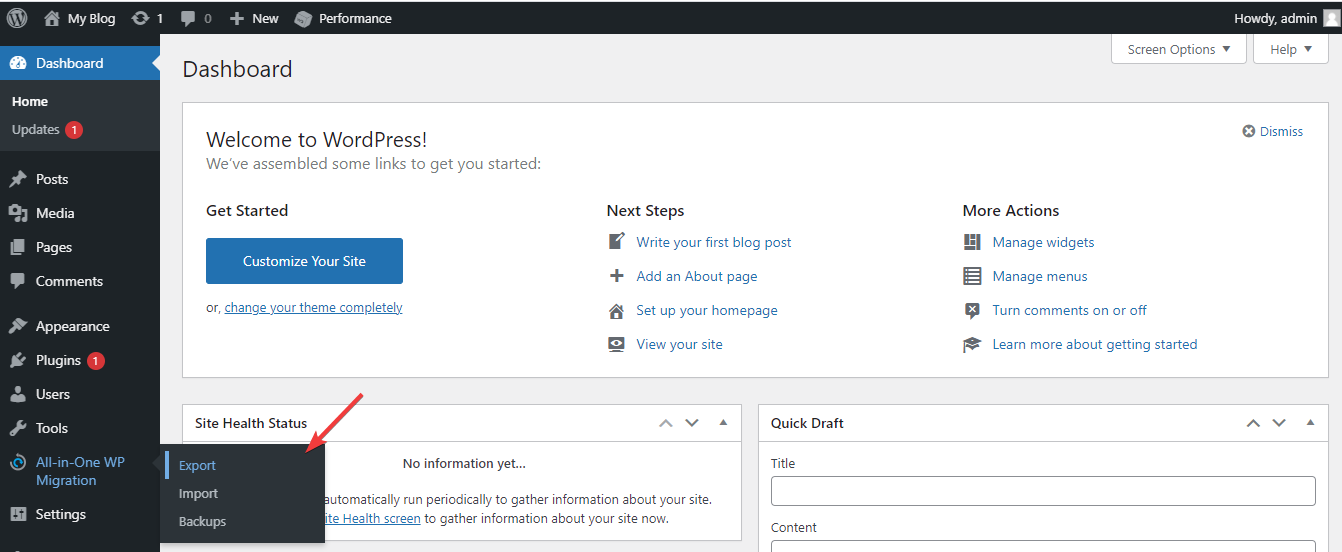
Choose Export to File, and download afterward. The exported file will be saved on your computer, in the downloads folder.
With that step completed, you are ready to import the exported file into your website online.
Login to your WordPress online installation, open the All-in-One migration plugin again, but this time select Import from file.
Locate the file you had earlier exported, select it, and the importation process will start.
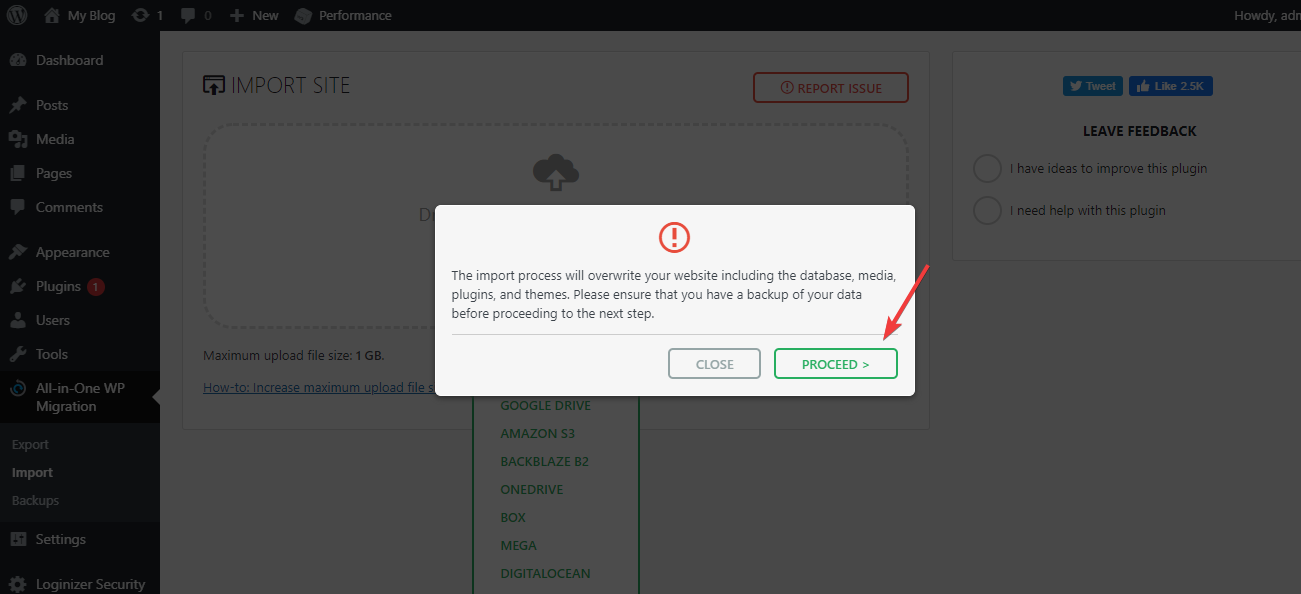
Once the import has completed, you will be notified that your website’s media, database, and plugins are about to be overwritten. This means that the database, plugins, and media on the current website are about to be replaced with that of the website you are importing. Click Proceed
Once the process has completed, click the Finish button like so:
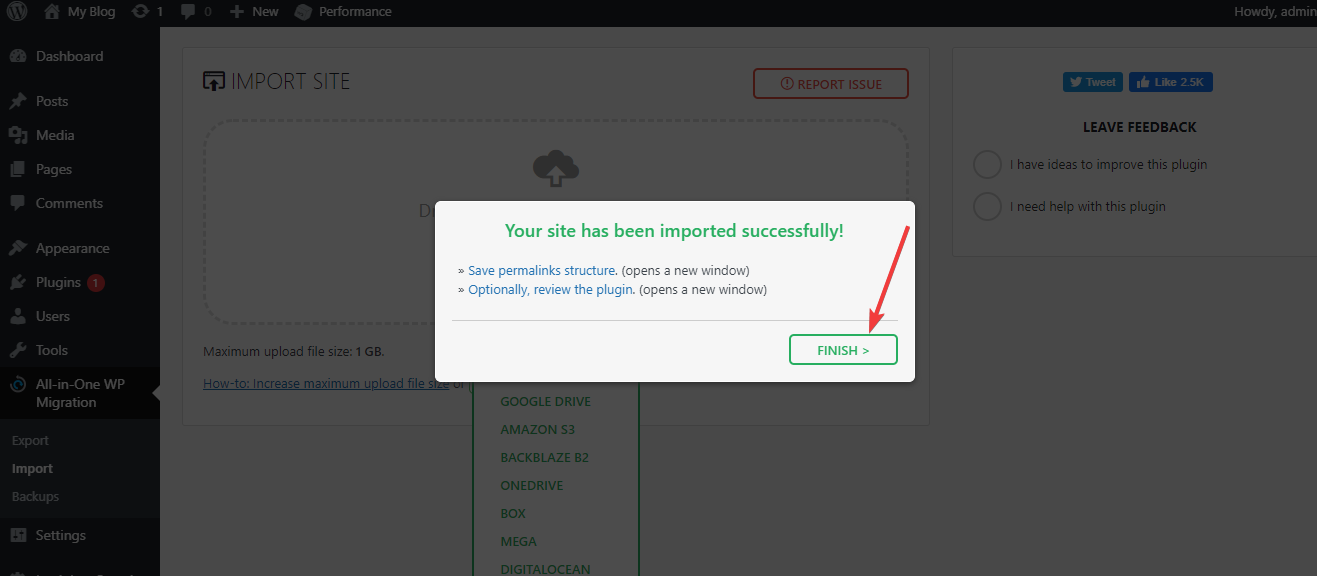
And you are done. Of course, you can choose to save your permalink structure before hitting the finish button.
Learning how to install WordPress, both locally and online has never been easier, thanks to this detailed tutorial.
If you found this guide useful, be kind enough to share!